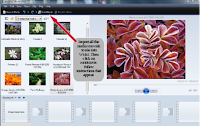
To determine the contents of your Auto-Movie, click a collection in the Collections pane, or hold down the CTRL key and then click multiple clips in the Contents pane.
The collection or group of files must contain video, audio, pictures, or a combination of these with a combined duration of at least 30 seconds. Windows Movie Maker assigns each picture a duration of 4 seconds.
> Click Tools, and then click Auto-Movie.
> On the Select an Auto-Movie editing style page, select an AutoMovie editing style.
> Under More options, click Enter a title for the movie.
> On the Enter text for title page, type the text that you want to appear as the title.
If you want to add music to the Auto-Movie, under More options, click Select audio or background music.
In Audio and music files, do one of the following:
> Expand the list, and then click an audio or a music file.
> Click Browse to import an audio or music file into Windows Movie Maker to use in your movie.
To adjust the mix of audio on the Audio/Music track and the background audio, do the following:
To increase the volume of an audio clip on the Audio/Music track, drag the slider toward Audio/Music.
To increase the volume of the audio on the Audio track that is part of a video clip, drag the slider toward Audio from video.
> Click Create Auto-Movie and wait for the clips in your movie to be added to the storyboard/time-line.
Example(click to enlarge view)

The time that it takes for the Auto-Movie to be created and added to the storyboard/time-line depends on the duration and number of audio, video, and pictures that are included in the collection or group of files that you selected.
After you create an Auto-Movie, you can publish it right away, or you can make further edits to the content on the storyboard/time-line, just as you would when you create a project on your own in Windows Movie Maker.
Tip
To display the time-line in greater detail so that individual clips appear more clearly, click the Zoom Time-line In button one or more times. This button appears on the time-line toolbar as a magnifying glass with a plus sign.
